25 April 2016

Clamshells


Today I have been quilting clamshells over this delightful sampler quilt and instead of holding with tradition, I continued the quilting over the pieced and appliqued blocks.


 I used a fine cotton thread in a pale shade which softens the look.


I love the affect!
 

13 October 2014

Sashiko Art

This charming little sample of Sashiko art is made by Janelle Kapernick of Qld.


I just love that Janelle chose to use a dyed fabric to capture the moon behind the clouds. Very clever.

I chose to add curved quilting lines with directional change to mimic the changing flow of the ocean.

07 February 2014

Japanese Blocks


I am quilting this great quilt today made by Lynne McKinlay for one of her boys to celebrate his birthday.


Inspired, I think, by her recent visit to Japan, Lynne made this quilt using all Japanese fabrics (plus a few cuttings from old shirts..... sentimental reasons).


You'll always find a dragonfly somewhere in any of Lynne's quilt. Sort of her signature and this one is no exception.


The design is one example of repeating blocks published in a book titled 'Japanese Quilt Blocks to mix & match' by Susan Briscoe.

04 February 2014

E2E with No-Sew Areas

Here's an idea for quilting..... if your quilt includes embroidered blocks or fabric photos and you don't wish the quilting to go over these areas, you might like to consider Edge-to-Edge quilting with No-Sew areas.


Here I have quilted an E2E design over the quilt but I stopped the quilting at the edges of the fabric photo frames.
Actually I can't imagine a time when I would quilt over a fabric photo, it would distort the picture and put holes in the printable fabric.

This family album quilt was made by Christine Price of Albany Creek to celebrate a special anniversary.


The photo to the right is shows a quilt made by Dianne Orr and her friends and family is another example.


Here I have quilted the Alphabet on all the background (sashings and borders) only.


 Later I added more specific quilting to each individual block.


Just some examples of quilting techniques.


03 February 2014

Fresh as a Daisy!

Yellow and White quilts always seem so fresh and crisp to me.


So appropriate that Jean chose a quilting pattern called Daisy Swirl. Turned out just right.

17 October 2013

Craft & Quilt Fair - Brisbane

.....following on from previous post...
The real point of this exercise (Dinosaur Quilt) is to make some important points about sizing the backing to suit a quilt top.
Here's how to calculate the size of a backing:
1. Measure the Length and Width of the quilt top and jot those measurements down.
2. Add 6 - 8 inches both the length and width and jot those new measurements down too.
Note: if you are quilting your own quilt ie by domestic machine or hand quilting you probably won't need so much extra but, if you are sending your quilt off to a commercial quilter they will (as I will) need at least 3" extra on all four sides.

So having added the extra 6-8 inches you now have the correct size of the backing to fit your quilt top.

If you plan a seamless backing for your quilt and if your quilt is a small cot size, an ordinary width patchwork fabric will be wide enough. So you will only need to purchase the length of the backing.

If, however, the quilt is larger than cot size you will need more than one length, perhaps 1 + 1/2 lengths, 2 lengths, 2 1/2 lengths or even 3 lengths for a king size quilt. Although you might consider a wide backing fabric for the larger sized quilts.
I talk about seaming lengths together on my website go to  http://thequiltconnection.com.au/quilt-preparation/ and print out the PDF titled Quilt Backings...

Okay so getting back to the point of this exercise....

Now that you have calculated the size of the backing required, you can now set about planning a pieced backing to fit, and you can be as creative as you like.
Just a couple of things to remember though, before you start.

1. Plan the piecing so that (as much as possible) the grains go in the same direction. ie lengthwise grain running vertical recommended. For more information about Fabric Grains go to http://thequiltconnection.com.au/quilt-preparation/.
2. Position any seams in the backing that run parallel to the edges of the backing a distance away from where the edge of the quilt top will be. See photos to follow:

This photo shows my little dinosaur quilt laid out on top of its pieced backing.


Notice that the edge of the quilt top is 1 1/2" away from the seam that joins the ricrac fabric to the sides, the top and the bottom of the backing.
This is the important point!


This photo shows by the outline I've marked, (marked only for demonstration purpose only) where the edge of the quilt top will fall. I should say that it doesn't matter if a seam crosses the edge of the quilt top.

I wonder if you have worked out why I am taking the time to explain all this???


Sooooo....

If a seam is positioned too close to the edge there is a risk that after quilting that seam will end up aligned with the edge of the quilt top and will therefore have to be included in the binding and that would not be a good thing.

Cheers til next time.

Craft & Quilt Fair - Brisbane

This week I am having fun at the Fair!
I'm a guest of Imaaje C29 (one of my favourite online fabric shops) and giving free workshops at 11.30am every morning in Workshop 2 introducing new quilt-makers, and taking the more experienced back, to the Basics. It is my hope that the information I share will help patchworkers to achieve better results and therefore more enjoyment from this much loved craft.
The workshop is titled 'The Quilting B's" because I am talking about Backings, Borders, piecing Blocks, and a bit of all things in between...... well, I only have 20mins so everything? not possible.


Dinosaurs Quilt
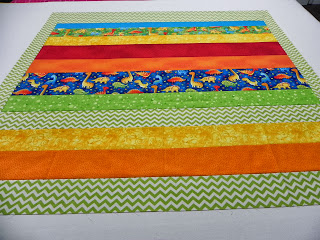
Anyway thought I would share a couple of photos of one of the little samples I created to demonstrate the difference made when you 'press as you go', tidy threads as you go and Butting seams where they interlock. Oh and also ... how when Borders are calculated correctly, they sit flat and even around the quilt.

wrong side of quilt top showing seams etc
Pieced Backing using leftover strips